Table of Contents
Step 1. Import your PDFs #
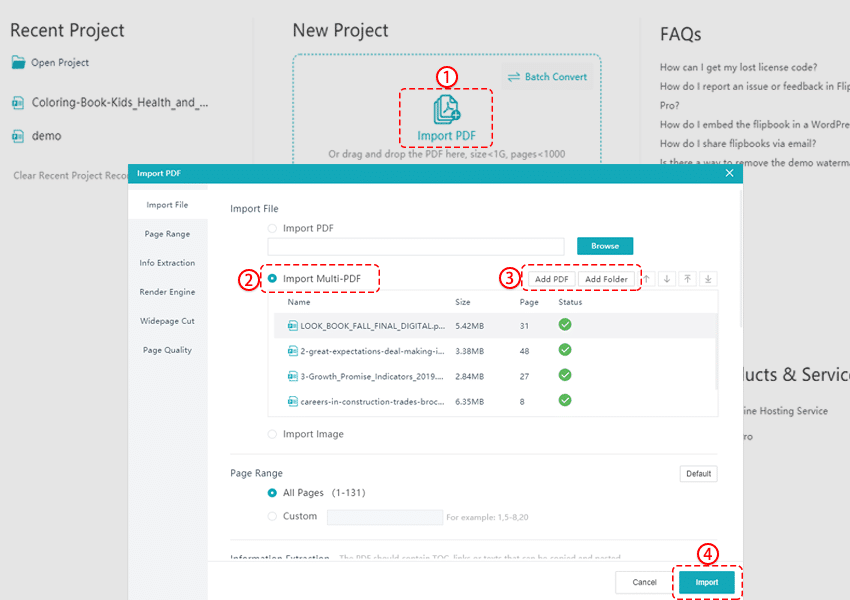
1. In the start page, click [Import PDF]. 2. In the pop-up window, hit on the option [Import Multi-PDF]. 3. Click [Add PDF] or [Add Folder] to upload your PDFs. 4. Then click [Import].
Before importing, you can set the page range to be imported. You also can customize the parameters of your flipbook page quality.
Step 2. Customize your flipbook #
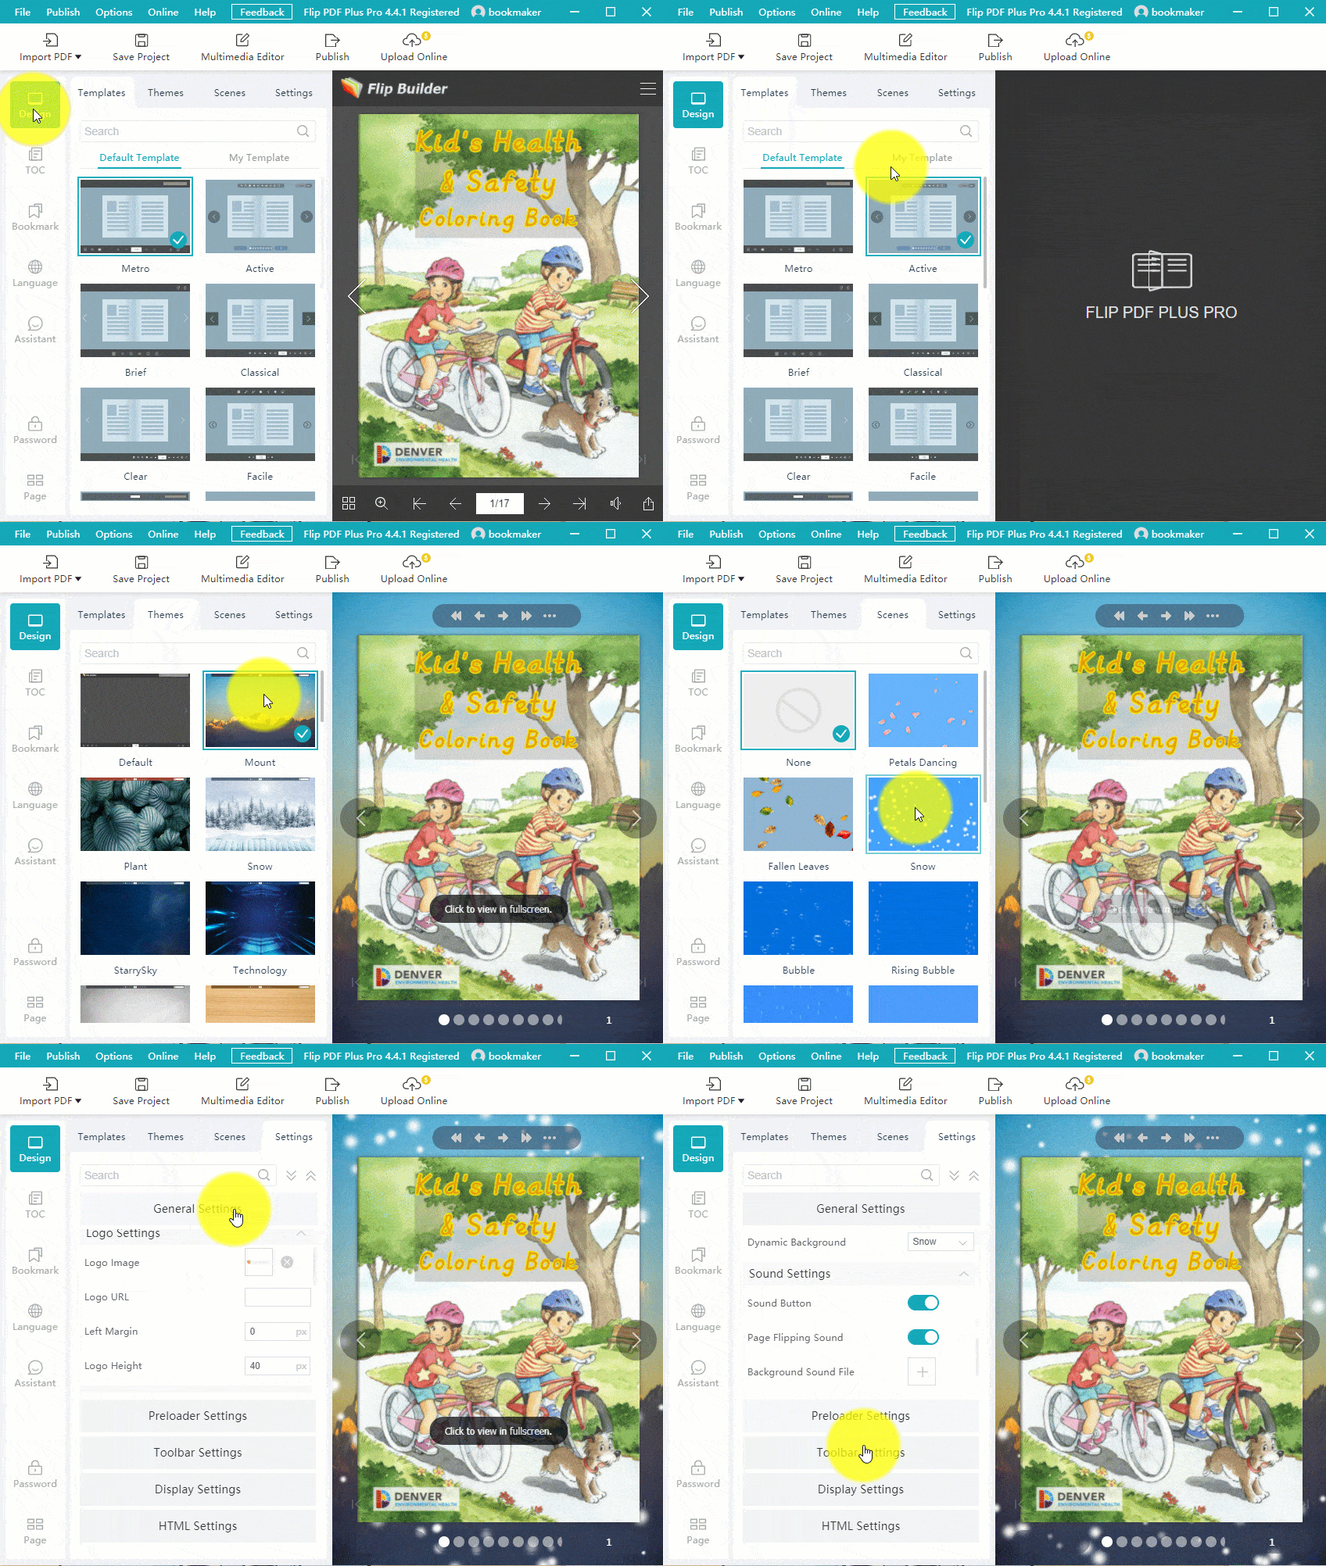
After converting, if you want to further customize your flipbook. You can apply the built-in templates, themes, scenes and customize more settings such as logo, background and sound.
You also can click buttons in the sidebar to customize the TOC and bookmark, to change the language or to add a voice assistant and set a password.
Step 3. Add multimedia and animation #
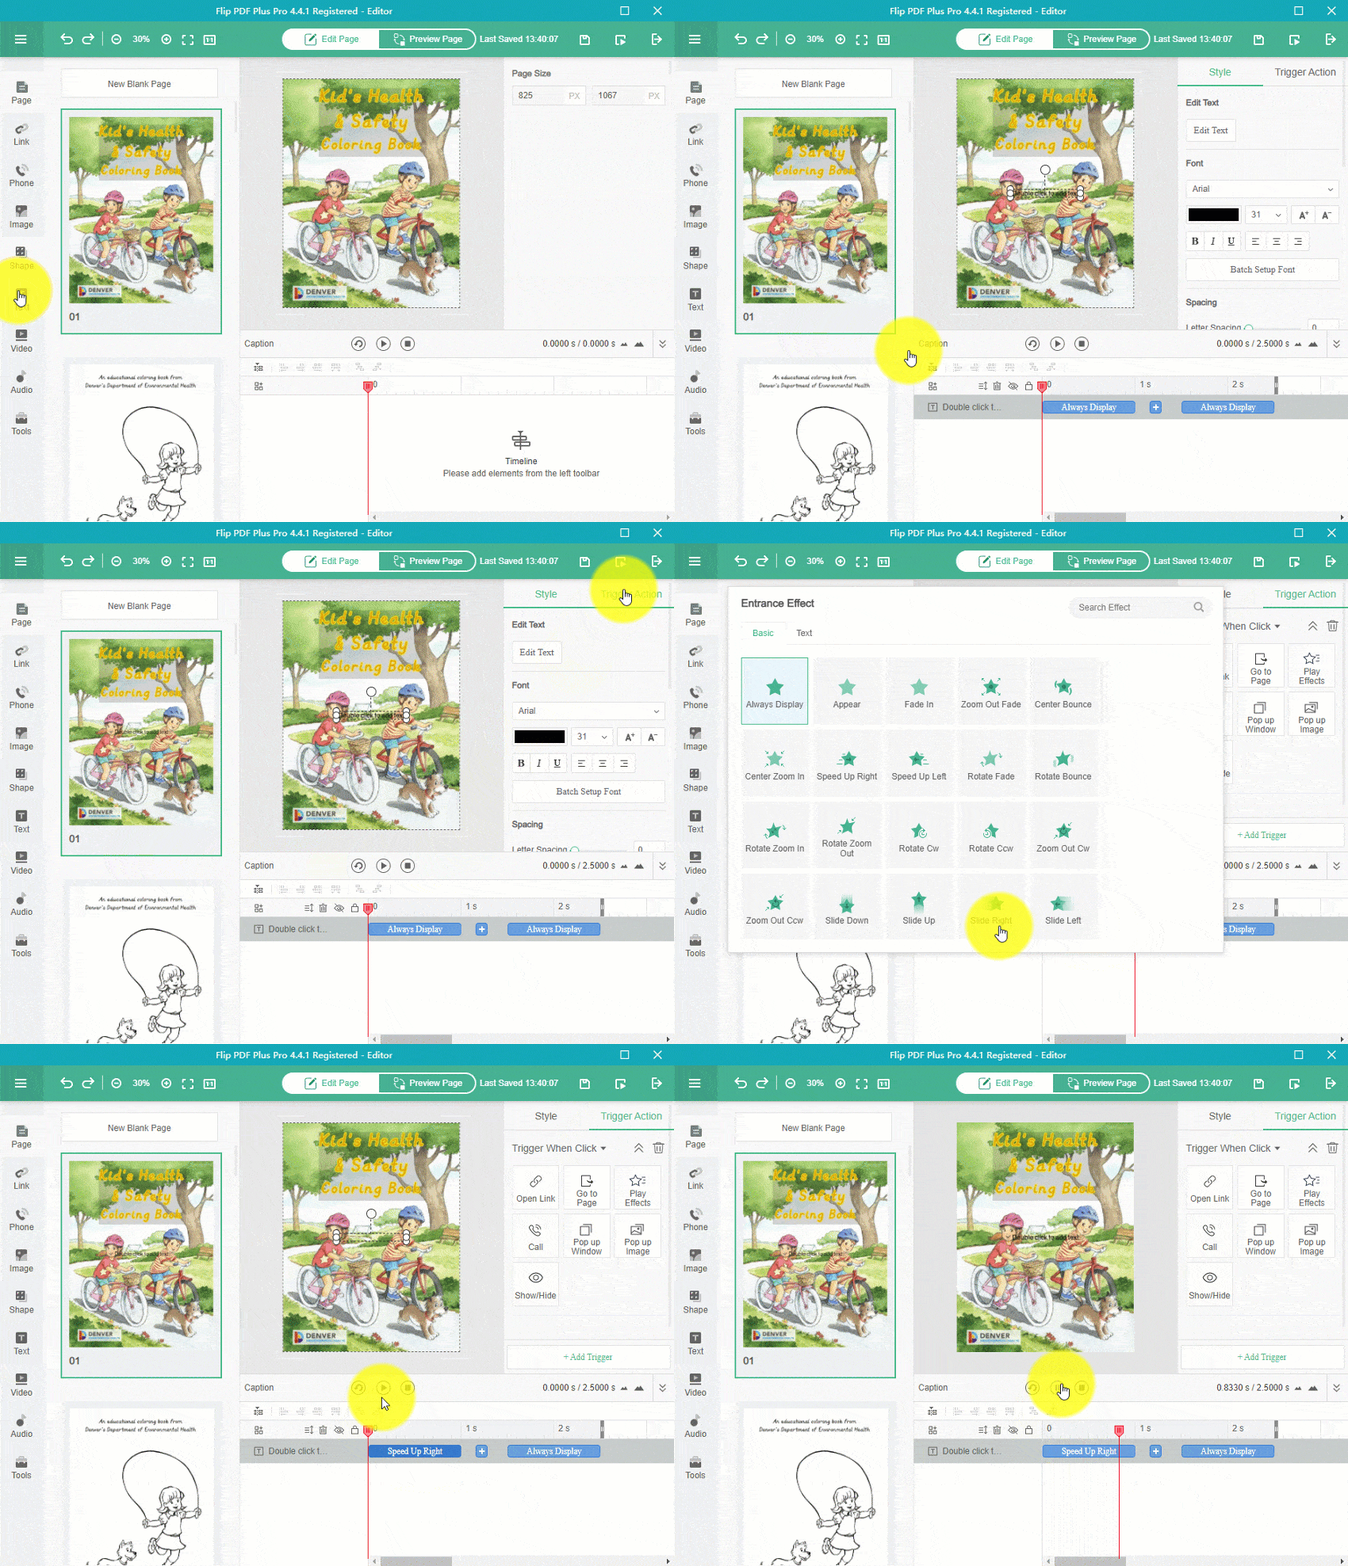
In the multimedia editor, you can add multimedia such as links, phone, images, shapes, texts, videos, audios and other tools into your flipbook. You also can add interactive animations for elements.
Note: Only Flip PDF Plus Pro and Flip PDF Plus Corporate have this feature. Flip PDF Plus doesn’t.
Step 4. Publish your flipbook #
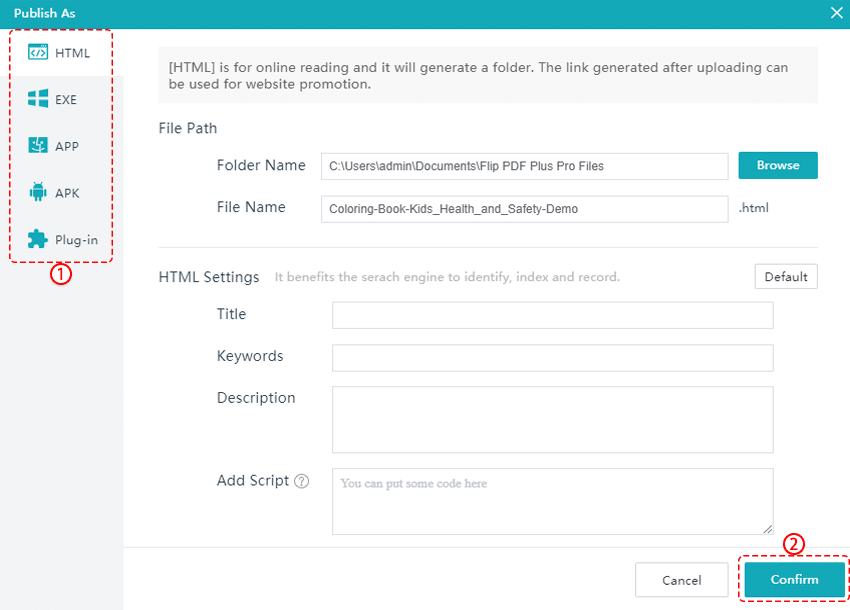
After further customization, you can publish your flipbook as an HTML file, EXE, APP, APK and WordPress Plug-in for online or offline reading.